Yesterday I blogged about how I learned to create my own graphs! This mostly works with any image, but for pictures you may need to edit those to Rasterize them.
Rasterize means : convert (an image) into pixels.
So that’s not a great definition, but it looks very pixelated. Anyways for this tutorial I used Excel 2007 (check out OpenOffice if you don't have Microsoft Office)and Photoshop CS 5.1(you can use GIMP if you don't have Photoshop), and Acrobat X Pro which allows me to create PDF files.
First open Excel:

For this tutorial we will create a box that is 12 pixels by 12 pixels. Select the area between two columns. I used A and B, and pull it to the left.

You will see a small grey box appear that will have the pixel amount in parentheses. When the pixels equal 12, stop. The number outside of the parenthesis will be 1. Make sure to write them down. On the left side are numbers, select the space between row 1 and 2. Drag it up till the space is equal to 12 pixels. The number outside of the parenthesis will be 8.

Select the amount or rows and columns you want. I selected nine rows and ten columns to make a rectangle.

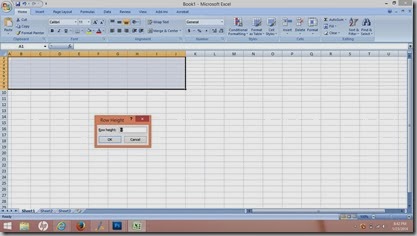
On the Home ribbon there is an area for cell format. Select the arrow for the Row format. Remember the number you wrote down, enter the Row number into the box that pops up. The selected rows will become the same size.


Repeat this step, except with the width adjustment for the columns.


Your columns and rows should be the same width and height. Make sure these are still highlighted.

Next, go back to the Home tab and on the ribbon, under the font will be a box that has a bold under line on it. When the mouse hoovers over this box it will say ‘Border’, click its down arrow and select all borders.


Look! You made a graph! Now you can either print this off and draw your own image into the graph, or save the graph as a PDF. If you use Photoshop, you have the option to open the image or the page, select the page option. It opens with a transparent background.


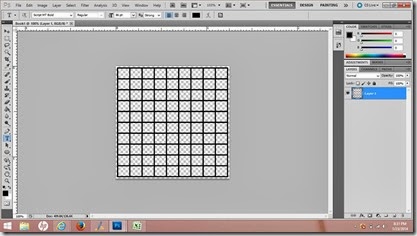
In Photoshop, open whatever picture you want and select it, copy and paste it. If you are working on letters you can simply type them out and move a layer down. For this tutorial I just used text. If you notice, in this image the grid I created is 1 1/4 inch by approximately 1 1/8 inch.

At this point my grid is 10x9. It fits a 89 point font nicely within its borders.

But what if I wanted to make a Monogramed blanket? Easy!
Duplicate the layer, and take the new layer and fit it in to a quadrant of the grid. This allows you to make a grid that will fit on one sheet instead of multiple sheets. Which saves you paper and in turn money.

Just duplicate the resized grid and move them into separate quadrants.

Make sure to change the opacity of the image other wise you won’t see the grid. In the end you will have a grid of 20x18. You can also change the page size but for the sake of time, I left the grid the size Excel saved it at.

There is it! A finished graph.This graph isn’t ideal to print off due to size, but you can always use the image you opened up and simply move the graph there and manipulate the graph to your liking!

AWESOME! Thank you so much!!!! This is going to save me hrs of work figuring it out on my own! Thank you, thank you, thank you!!!! :D
ReplyDeleteNo problem! Let know if there are any issues.
DeleteVery Nice Carol.
ReplyDeleteThank you, let me know if it helps!
DeleteGreat!
ReplyDeleteThank you, let me know if this helps with your graph making!
Delete